Overview: The Contractor Database is used to maintain addresses, phone numbers, contact names, minority status, work locations, and types of work performed. The Contractor information can also be used to print lists of Contractors, print form letters (using Microsoft Word and Mail Merge) and print address labels for the Contractors.
The information in the Contractor Database can also be used within the estimating program to generate reports.
- Specific pay items and tasks can be linked to specific subs.
- Minority percentages can be monitored and maintained.
- Reports listing the subs and/or minorities including all the pay items that each sub quoted.
- Take Sub/Supplier quotes and decide which sub to load into the estimate.
- Import Contractors from BidTabs Professional (if you have purchased that Oman Systems program).
(See Estimating and Estimating (Advanced Options) for more information about incorporating Contractors into estimates.)
Figure 1, below, shows the main window for the “Contractor Database”. From the "Contractor Database" window you can add, delete, edit, and print. In addition, location codes, work category codes, and minority status can all be entered for each Contractor. Each field option is explained below.
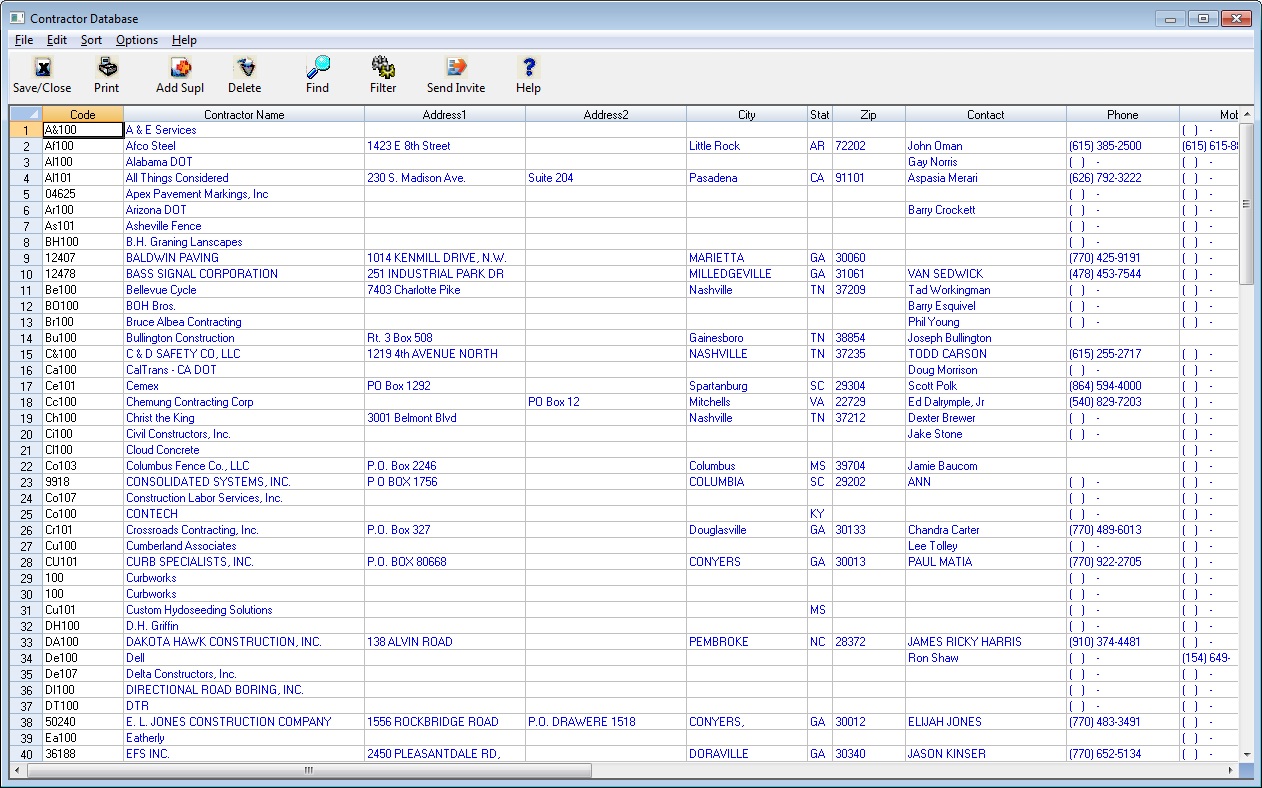
Figure 1
| Toolbar |
The “Toolbar” at the top of the screen gives you quick access to commonly used menu commands. Listed below are descriptions of each button: |
|
|
|
| Save/Close | Press the Save/Close button to close the Contractor Database window and save any changes. |
|
Pressing the PRINTER icon will display the report options screen for the contractor database. See the FILE: PRINT section later in this chapter for all the report options. |
|
| Add Supl | Press the Add Supl to add a new record to the contractor database. |
| Delete | Press the Delete to delete the current item from the database. |
| Find | Press the Find button to search on several different criteria. |
| Filter | Press the Filter Button to refine your search |
| Send Invite | Press the Send Invite button to send a bid invitation to the highlighted subcontactor/supplier |
| Help | Press the Help Button to access this Help Menu |
| Spreadsheet Columns |
The contractor database spreadsheet contains a number of columns where you can enter data. Listed below are detailed explanations of each column. |
| Description | The description field can be up to 100 characters in length. |
| Address1 | The field can be up to 100 characters in length. |
| Address2 | The field can be up to 100 characters in length. |
| City/State/Zip | The field can be up to 100 characters in length. |
| Contact |
This field is the person within the Contractor's organization who is your point of contact. The name entered should be the name of the person to whom correspondence is sent about bidding jobs. This field is also used in the “Custom Quote System” (see Chapter 4 – Estimating (Advanced Options) for additional information on this option). |
| Phone/Fax | This field can be up to 30 characters in length. |
| DBE |
This field allows you to select the Minority status of the currently displayed Contractor. Using this field makes it easy to track minority participation within an estimate whenever you use this field. Double click the DBE column to toggle between the following options: DBE, WBE, MBE, Other, blank (none) |
| Notes |
This field can be used to enter any type of notes, comments or general information about the currently displayed Contractor. |

| FILE: PRINT |
This option allows you to print the contractor database. See the next section for more information on the different Report Options for the contractor database. |
||||||||
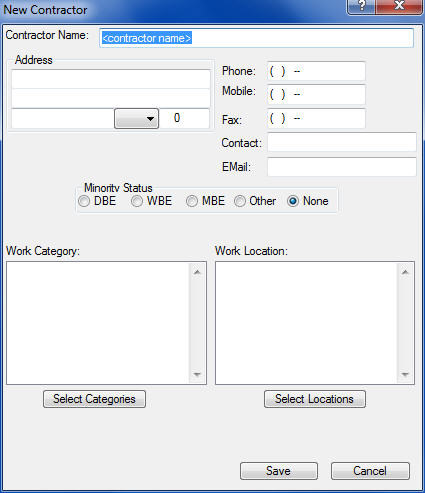
| EDIT: ADD NEW ITEM |
Use this option to add a new contractor to the database. After selecting this option you will see the screen shown in Figure 4. Enter the appropriate information on this screen and press the SAVE button. |
||||||||
|
|
|||||||||
| EDIT/DELETE ITEM |
This option allows you to delete items from the database. To delete a single item, simply click anywhere on the row of the item to delete and select the EDIT: DELETE ITEM menu option. You can also RIGHT CLICK and select DELETE CURRENT ITEM from the pop-up menu. |
||||||||
| EDIT/LOCATIONS DATABASE |
This option allows you to edit the Locations Database. The locations database allows you to set up your own list of locations that you can then assign to different contractors. See the section later in this chapter for more information on editing this database. |
||||||||
| EDIT/WORK TYPE DATABASE |
This option allows you to edit the Work Type (or categories) Database. The work type database allows you to set up your own list of work categories that you can then assign to different contractors. See the section later in this chapter for more information on editing this database. |
||||||||
| EDIT/SHOW SUB CODES |
If this menu option is checked, then the spreadsheet view (Figure 1, above) will show the codes for each contractor. If this option is not checked, then the code column will not be displayed. Normally the system will create and track sub codes automatically. However, there may be times when the you want to enter your own codes (for example if you need to match the Customer ID assigned in your accounting system). |
||||||||
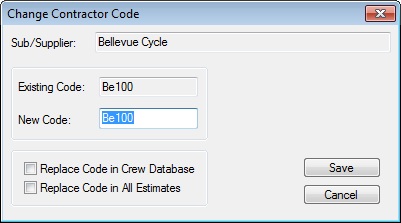
| EDIT/CHANGE SUB CODE |
If you are showing sub codes (see the previous menu option), then you can use this option to change the code for a selected contractor, Figure 5, below. |
||||||||
|
NOTE:You can also change the sort code by double-clicking on the sub code that you want to change. Simply type in the new code and press the SAVE button. If this sub is used within the crew database, then check the “Replace Code in Crew Database” option before pressing SAVE. You also have the option to "Replace Code in All Estimates." |
|||||||||
| SORT | There are four ways you can sort the Contractor Database. The sort option you select on this screen will be the order in which the contractors will be displayed within an estimate. | ||||||||
|
|||||||||
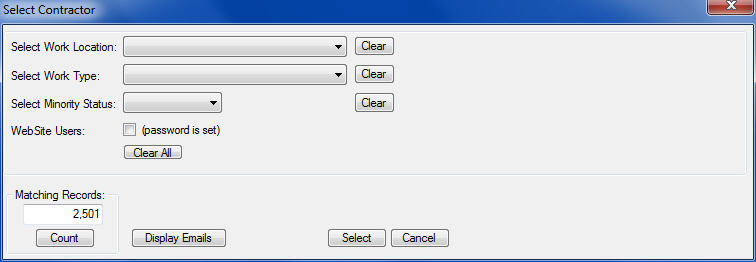
| SORT: FILTER DATABASE |
Selecting this option will open the screen shown in Figure 6. It allows you to filter the database based on selected criteria. You can filter the database on any or all of the following: Location, Work Type, and/or Minority Status. For example, you can filter the database to see only the Minority Grassing contractors that perform work in Middle Tennessee. Select the FILTER menu command and select the desired items to search for. |
||||||||
|
|
|||||||||
| Count | Press the Count button to see the number of items in the database that match your search criteria. | ||||||||
| Diplay Emails | Press the Display Emails button to show the email address of the selected contractors. | ||||||||
| Select |
Once you have entered the desired search criteria, press the SELECT button to actually filter the database. Remember that the database will only list those items that match your search criteria. |
||||||||
| WebSite Users | This option not currently available. | ||||||||
| Cancel |
Press the CANCEL button to close the selection window and return to the contractor database without performing the filter. |
||||||||
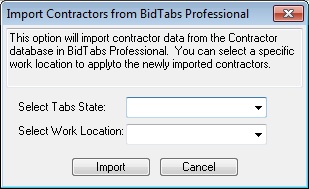
| OPTIONS: IMPORT FROM TABS DATABASE (Only operable if you have the BidTabs Professional program from Oman Systems and have entered the program path to Tabs on the Program Preferences screen.) |
This option allows you to load Contractors from BidTabs Professional. After selecting this option from the OPTIONS menu, you will see the screen shown in Figure 7. |
||||||||
|
|
|||||||||
| Select Tabs State |
(REQUIRED) This list box will display a list of all the Tabs Databases you have loaded on your computer. You must select which State Database to load. If you want to load Contractors from multiple states, simply import the data a second time. |
||||||||
| Select Work Location |
(OPTIONAL) This option allows you to select a Location Code to apply to all of the Contractors loaded into your database. |
||||||||
|
After pressing the IMPORT button, all of the Contractors in the selected state database will be loaded into your Contractor Database. NOTE: The system will check for duplicate names; and unless the names are EXACTLY alike, it will add a new record(s) to the database. |
|||||||||
| OPTIONS: FORM LETTERS |
This option allows you to set up form letters using Microsoft Word. Then, using the mail merge features built into Microsoft Word, print form letters to selected Contractors from the Contractor Database. This option is similar to the Custom Quote System within the estimating system [See Estimating (Advanced Options) for more information creating custom quotes] and is explained in detail later in this chapter. |
||||||||
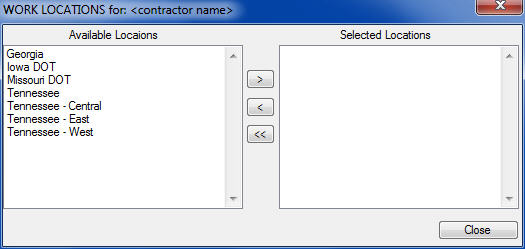
| OPTIONS: EDIT CONTRACTOR LOCATIONS |
These fields are used to enter the Main Location Code for the currently displayed Contractor. A Location Code is a user-defined code that allows Contractors to be sorted by the areas in which each sub works. In addition to the “Main Location” you can also select “Additional Locations” for each Contractor. |
||||||||
|
|
|||||||||
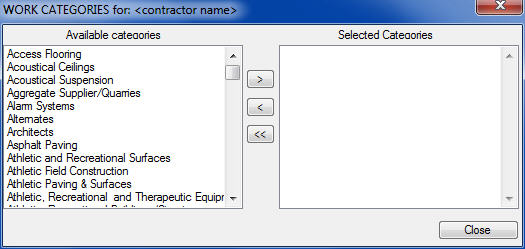
| OPTIONS: EDIT CONTRACTOR CATEGORY |
This list box displays the “Work Categories” for the current Contractor. Work Categories are used to list the types of work each Contractor performs, like bridgework, paving, guardrail, etc. The user defines the Work Categories. The categories are used when printing lists of Contractors who perform specific types of work. |
||||||||
|
|
|||||||||
| OPTIONS: FREEEZE COLUMNS |
This option allows you select the number of columns to lock (or freeze). A frozen column will not scroll off the left side of the screen and will always be visible. |
||||||||
| ENTERING LOCATION CODES |
User Location Codes allow you to enter the locations or areas where a specific Contractor works. You can enter up to 10 location codes for each Contractor. After entering location codes for a Contractor, you can then sort and filter reports based on the Codes you entered as well as sort and filter the list of Contractors in the form letter option. |
||||||||
SELECTING CONTRACTORS
When you press the “Select Contractors” button you will see the screen shown in Figure 16. From this screen you can select the Contractors to include in the current form letter.
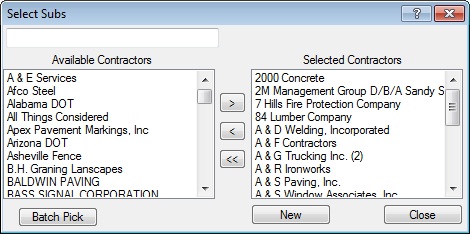
Figure 8
| “blank field” |
This option allows you to type in a Contractor’s name (or partial name) to quickly locate a specific Contractor. As you type, the “available” window will scroll through the database attempting to find the name you are typing. |
| Available Contractors |
This box displays a list of all of the available Contractors in the database. You can double click on a Contractor to move the item from the “available” list to the “selected” list. |
| Batch Pick |
This option allows you to select a group of Contractors by Work Type, Work Location, or Minority Status. See below for more information on this screen. |
| “<<” | This button will REMOVE ALL the SELECTED Contractors. |
| “<” |
This button will move the currently highlighted Contractor from the Selected window to the Available window. You can also simply double-click on a Contractor to move from one window to another. |
| “>” |
This button will move the currently highlighted Contractor from the Available window to the Selected window. You can also simply double-click on a Contractor to move from one window to another. |
| Selected Contractors |
This box displays a list of all of the selected Contractors in the database. You can double click on a Contractor to move the item from the “selected” list to the “available” list. |
| New | This option allows you to add a new Contractor to the database. |
| Close | This option will close the Contractor Selection Window and save any changes you have made. |
The screen in Figure 17, below, allows you to select a group of Contractors based upon selected criteria. This is the screen that is displayed by pressing the “Batch Pick” button on Figure 16.
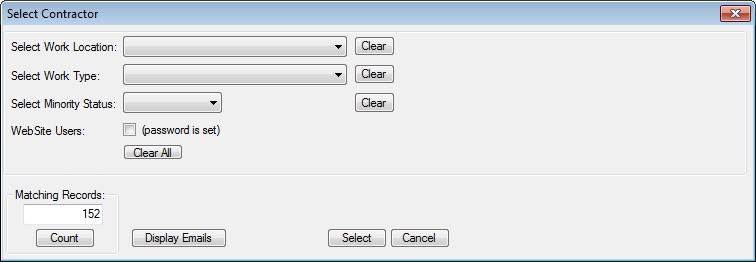
Figure 9
| Select Work Location | Use this option to select a Work Location. You set the work location for a Contractor on the main Contractor Database window. |
| Select Work Type | Use this option to select a Work Type. You set the Work Type for a Contractor on the main Contractor Database window. |
| Select Minority Status | Use this option to select a Minority status. You set the minority status for a Contractor on the main Contractor Database window. |
| Clear All | Press this button to clear any/all filter settings and reselect ALL the Contractors in the database. |
| Count | After you select a filter, press the COUNT button to see how many Contractors meet the criteria you have selected. |
| Clear | These buttons allow you to clear a specific setting. |
| Select |
Pressing this button will load the Contractors you have selected into the current form letter. You will then be returned to the Select Contractors screen where you can edit the list of Contractors you selected. |
| Cancel | Pressing this button will close the current window WITHOUT saving any changes. |