Home > Program File Maintenance > Restore from Auto Backup
Restore from Auto Backup
|
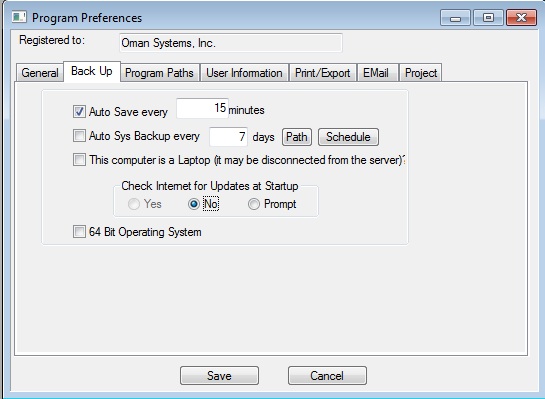
The previous section describes how to perform manual back-ups of all the data on your system. This section explains how to configure your system to automatically perform this same type of backup on a scheduled basis. On the program preferences screen, check the “Auto Sys Backup” and enter a number of days. We recommend that you perform a system backup at least every 7 days. |
|
|
|
Figure 1 |
|
**NOTE FOR NETWORK USERS**
Network version users only need to set this up on ONE workstation since all the users on the system use the same data. |
|
You should set the backup path to a computer other than the one where the data files are saved (possibly your local computer for network users or a server for single user systems). This will allow you to recover your data if the computer containing the data crashes. |
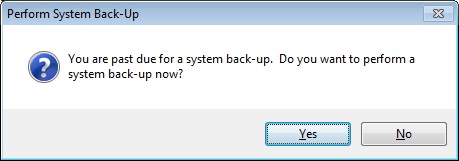
| Once you have enabled this option, you will see the following prompt, from time-to-time when you start your system. |
|
|
|
Figure 2 |
|
Answering YES will start the backup process. The time it takes to complete a system backup will vary depending on the amount of data on your system, but should normally take no more that a couple of minutes. |
|
If you ever need to RESTORE from an automatic system backup, select DATABASES: BACKUP /RESTORE DATA FILES

Figure 1
|
|
Once the Back-Up Type window appears select, SYSTEM BACKUP/RESTORE to continue.
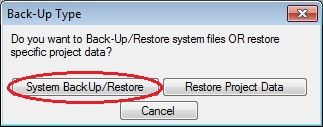
Figure 2
|
|
From the displayed window, select the “RESTORE from Auto Back-Up” option and press the FIND button.
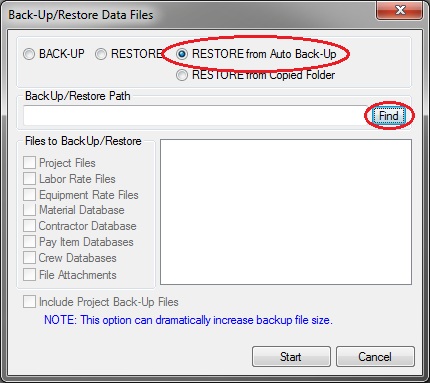
Figure 3
|
|
You will then see the window shown in Figure 4. From this screen you can then restore from any of the listed system backup dates. The displayed list is sorted by date with the most recent backup at the top.

Figure 4
|
|
Highlight the date to restore and press the SELECT button.From this screen you can also delete old system backups. Simply select the date(s) to delete and press the DELETE button. To delete a range of backup, press the "Del Range" button and enter the dates to delete.

Figure 5
|
| All files equal to or earlier than this date will be deleted. |
See also