Home > Project Closing > Mark-Up Options > Using Alternate Mark-Ups
Using Alternate Mark-Ups
|
Overview: This option allows the estimator to set up different mark-ups to be applied to specific pay items or tasks within an estimate. You can also use this feature to set up different work schedules for different pay items and tasks. The first step in using Alternate Mark-Ups is to set up the different mark-up sets. A mark-up set is a table of mark-ups for each cost type as well as a work schedule. You can have up to 99 different mark-up sets. From the “Project Settings Screen,” press the “Alternate Mark-Ups” button at the bottom of the screen as shown in Figure 1.
|
|
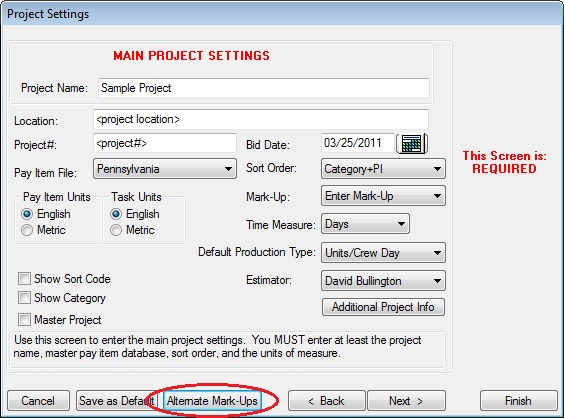
Figure 1
|
|
The first time you open a new mark-up set, you will see the following message (Figure 2):
|
|
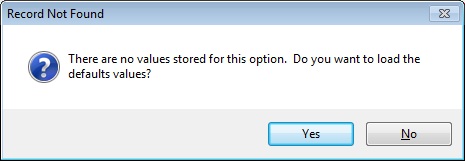
Figure 2
|
|
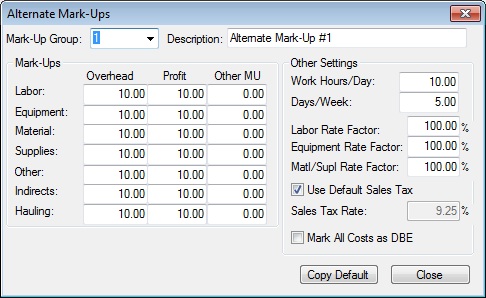
This allows you to initially load the project default mark-ups into the new mark-up set. The next screen you will see is shown in Figure 3. From this screen you can enter the mark-ups and work schedules for up to 99 different mark-up sets.
|
|
|
|
Figure 3
|
|
Mark-Up Group
|
Use this list box to select the mark-up set you wish to edit (from 1 to 99). |
|
Description
|
This field allows you to give a descriptive name to the alternate mark-up set. |
|
Mark-Ups
|
This section of the screen allows you to enter the percent mark-ups for each cost type. |
|
Work Schedule
|
Within each mark-up set, you can enter a new work schedule. The work schedule you enter will change the overtime calculations for the labor costs. ALSO, if you are bidding by the day (as opposed to the hour), if you change the work hours per day, the system will change the labor and equipment daily costs to reflect the new work hours per day.
|
|
Labor & Equip Factors
|
These two factors allow you to factor up or down the labor and equipment costs for a particular mark-up set. This option may be useful in situations where you will need to pay a labor premium (for example, for a night shift).
|
|
Material, Supplies, Other, Indirects & Hauling Factors
|
Allows you to apply specific mark-ups to these items. |
|
Copy Default
|
Press this button to load the Project Default Settings into the currently displayed mark-up set. This button will overwrite any values you have previously entered for this mark-up set.
|
|
Close
|
After you have set up all of the mark-up sets for the project, press the CLOSE button to return to the Project Settings Screen. Any changes you make will be SAVED automatically.
|
|
|
After you have set up the mark-ups, you can then select which mark-up set to use for a pay item or task using any of the following methods:
|
| (1) |
From the “Edit Pay Item” window (Figure 4), you can select the mark-up set to use for a specific pay item. All of the available mark-up sets are listed in the dropdown list box.
|
|
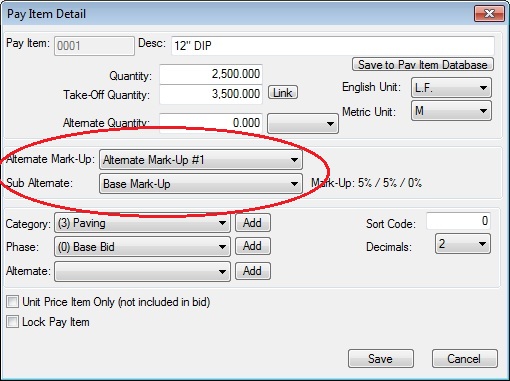
Figure 4
|
| (2) |
From the “Edit Sheet,” (Figure 5) you can enter the mark-up set number for each pay item. Simply type in the number of the mark-up set to use for each pay item. You can only enter a number of a valid, and previously saved mark-up set. If the pay item you selected has any tasks, you will be prompted if you want to change the mark-up set for all the tasks also. It is not required that tasks have the same mark-up set as the pay item.
|
|
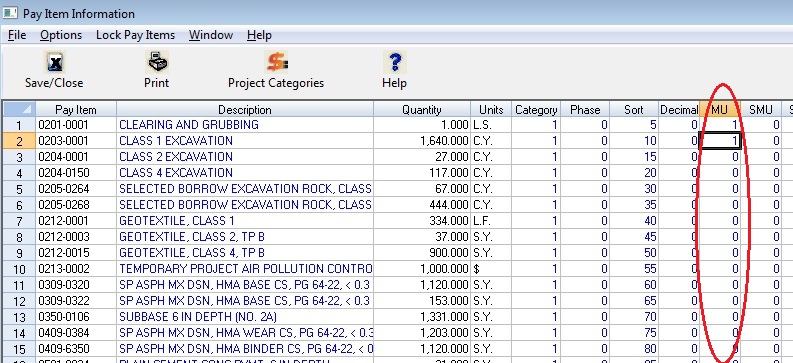
Figure 5
|
| (3) |
From the “Edit Task” window, you can select the mark-up set to use for a specific task. Once again, all of the available mark-up sets are listed in the dropdown list box.
|
|
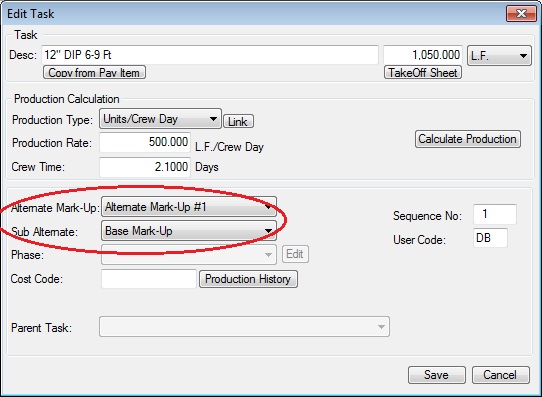
Figure 6
|
|
See also