This option is only available on the network version of ProEstimate and can only be used if you have previously unsynched. This option allows you to select any (or all) projects you have worked on since you disconneced from the server and load them back onto the server.
To select this option, select the "Synch With Network" option on the databases menu from the ProEstimate screen. NOTE: If the synch option is grayed out on the databases menu, then you will need to make sure the synch option is properly set in your program preferences. Click HERE for more information on configuring this option. Both options will open the Unsynch window shown in Figure 1.
NOTE: Before you synch back to the network, make sure you have a valid connection to your serever and the network path that contains the ProEstimate files is available from your computer.
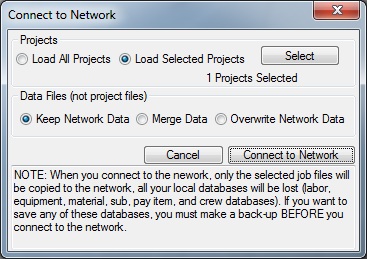
Figure 1
From this screen you can select each project that you want to load to the server. Double-click on a project to select the project and you will see a red check next to all the selected projects. Also the counter at the bottom of the screen will show you the number of projects you have selected. After you have completed the selection process, press the OK button to return to the synch options window. The Data Files option by default has "Keep Network Data" selected which is typical for most if not all instances. The Merge Data option will merge newly added database information (new labor rates, equipment, contacts, etc...) with the Network data. The Overwrite Network Data option will over-write the Network databases and copy from the local databases. WARNING: Only use this option when you want to over-write all the shared databases on the server. Once the routine of synching back to the server is underway each project being copyied TO the server is compared to the files already residing on the server. For each project where the server file already exists, the prompt shown in Figure 4 will be displayed allowing you to select from the following options: Copy, Overwrite or Nothing.
WARNING: Selecting NOTHING will lose any changes to the selected project you have made while disconnect from the network.
Projects
This option allows you to select which projects to load back onto the server. The selected projects will be copied from your local computer onto the server. If the project already exists on the server you will be asked how you want the system to handle these projects. More on this option below.
When you press the button, you will see the screen shown in Figure 3.
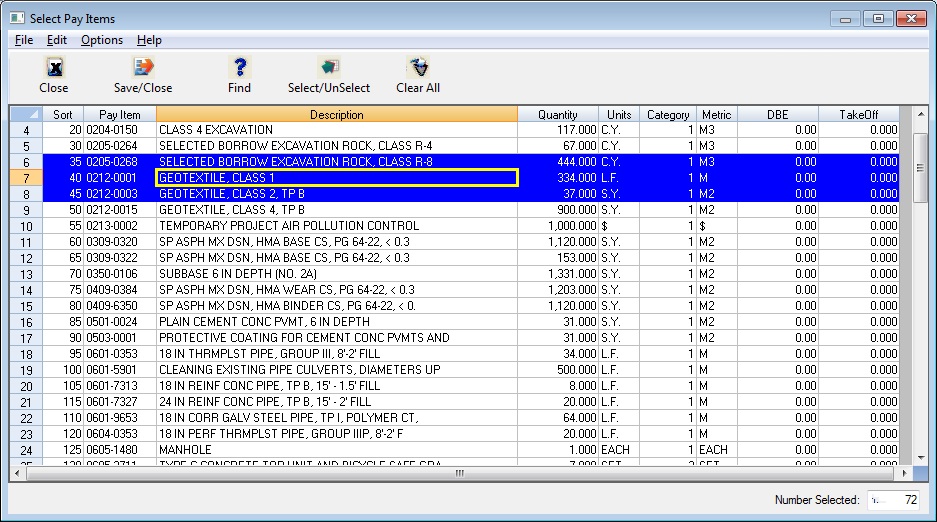
Figure 3
TIP: use the Select All and Clear All buttons for each folder to ease selecting/un-selecting projects.
Data Files
Select this option to cancel the synch operation and you will remain disconnected from the server.
After you have selected the projects you want to load, press the "Connect to Network" button to start the process. Depending on the options and the number of projects you have selected, this process could take from a couple of seconds to a couple of minutes.
Once the synch process has started, the system will automatically create a system backup of all the data on your local computer. If you are prompted to overwrite any existing backups answer YES to overwrite each one. These back-up files enable you to re-open in Stand-Alone mode should you forget to unsynch with the network or not select a project to load back to the server.

Figure 4